OpenClaw使用体验

OpenClaw使用体验

fanz Lv4

add at 03/31:更新 v0.3.31 版本的时候突然打不开 webui 了,一直爆出“internal server error”的错误,原来是官方的问题,更新到 v0.4.1 就可以了。。。

最近 openclaw 挺火热的,我也来安装体验一下。为了防止发生数据安全问题,这里我使用 wsl 安装一个 Ubuntu20.04 虚拟机来体验一下。

安装 openClaw

1. 配置虚拟机前缀历史命令

考虑到可能第一次安装的时候容易出现错误,需要反复执行一些命令,这里我配置了历史命令前缀匹配,这样输入命令的时候按 ↑ 键就能自动匹配指令,比较方便。

1
2
3
4
5
6
7
8
9
vim ~/.bashrc
# 在本文件末尾添加如下代码:
if [[ $- == *i* ]]
then
bind '"\e[A": history-search-backward'
bind '"\e[B": history-search-forward'
fi
# 添加完之后刷新
source ~/.bashrc

2. 安装 git、nvm、node.js

1
2
3
4
5
6
7
8
9
10
11
12
sudo apt install -y curl wget git
curl -o- https://raw.githubusercontent.com/nvm-sh/nvm/v0.40.4/install.sh | bash
source ~/.bashrc

# 安装好之后查看版本
nvm --version

# 由于使用openclaw必须使用npm22.0以上版本,这里需要安装
nvm install 22
nvm use 22
# 查看一下node.js的版本
node --version

3. 使用 pnpm 安装 openclaw

我自己尝试之后发现使用 npm 安装包巨慢,还是使用 pnpm 更快,这里就使用 pnpm 安装:

1
2
pnpm setup
pnpm add -g openclaw@latest

命令执行成功之后 openclaw 的依赖包其实就已经安装好了,接下来就只需要配置了。

1
openclaw onboard --install-daemon

具体的部署过程我觉得直接选择 quick-start 就行,然后可以不选 skill 和插件,先启动再安装也行。

4.对接硅基流动的 api

我平时模型 API 这方面主要用的是硅基流动这家,这里也用这家的 api 对接 openclaw。在这个部分踩坑非常严重,网上的教程实在太多太乱了,而且好多废话,还可能配置了没有生效。

其实主要是要修改 ~/.openclaw/openclaw.json 这个 json 文件,这里给出我的配置文件。需要注意的是,不能只在 provider 这个提供商部分修改,那里改完之后必须在 agents 这部分添加:

1
2
3
4
5
6
7
8
9
10
11
12
13
14
15
16
17
18
19
20
21
22
23
24
25
26
27
28
29
30
31
32
33
34
35
36
37
38
39
40
41
42
43
44
45
46
47
48
49
50
51
52
53
54
55
56
57
58
59
60
61
62
63
64
65
66
67
68
69
70
71
72
73
74
75
76
77
78
79
80
81
82
83
84
85
86
87
88
89
90
91
92
93
94
95
96
97
98
99
100
101
102
103
104
105
106
107
108
109
110
111
112
113
114
115
116
117
118
119
120
121
{
"agents": {
"defaults": {
"workspace": "/home/xx/.openclaw/workspace",
"model": {
"primary": "siliconflow/zai-org/GLM-4.6",
"fallbacks": [
"siliconflow/zai-org/GLM-4.6",
"siliconflow/Qwen/Qwen3.5-35B-A3B"
]
},
"models": {
"siliconflow/zai-org/GLM-4.6": {
"alias": "glm4"
},
"siliconflow/Qwen/Qwen3.5-35B-A3B": {
"alias": "qwen3.5-35b-a3b"
}
}
}
},
"gateway": {
"mode": "local",
"auth": {
"mode": "token",
"token": "cbd5xxxxxxxxxxxxxxxxxxxxxxxxxxx7xxxf"
},
"port": 18789,
"bind": "lan",
"tailscale": {
"mode": "off",
"resetOnExit": false
},
"controlUi": {
"allowedOrigins": [
"http://localhost:18789",
"http://127.0.0.1:18789"
]
},
"nodes": {
"denyCommands": [
"camera.snap",
"camera.clip",
"screen.record",
"contacts.add",
"calendar.add",
"reminders.add",
"sms.send",
"sms.search"
]
}
},
"session": {
"dmScope": "per-channel-peer"
},
"tools": {
"profile": "coding"
},
"models": {
"mode": "merge",
"providers": {
"siliconflow": {
"baseUrl": "https://api.siliconflow.cn/v1",
"apiKey": "你的硅基流动的API-KEY",
"api": "openai-completions",
"models": [
{
"id": "zai-org/GLM-4.6",
"name": "GLM-4.6",
"reasoning": false,
"input": [
"text"
],
"cost": {
"input": 0,
"output": 0,
"cacheRead": 0,
"cacheWrite": 0
},
"contextWindow": 200000,
"maxTokens": 8192
},
{
"id": "Qwen/Qwen3.5-35B-A3B",
"name": "Qwen3.5-35B-A3B",
"reasoning": false,
"input": [
"text"
],
"cost": {
"input": 0,
"output": 0,
"cacheRead": 0,
"cacheWrite": 0
},
"contextWindow": 200000,
"maxTokens": 8192
}
]
}
}
},
"wizard": {
"lastRunAt": "2026-04-12T06:16:42.573Z",
"lastRunVersion": "2026.4.11",
"lastRunCommand": "onboard",
"lastRunMode": "local"
},
"meta": {
"lastTouchedVersion": "2026.4.11",
"lastTouchedAt": "2026-04-12T07:59:45.298Z"
},
"skills": {
"entries": {
"nano-pdf": {
"enabled": true
}
}
}
}

好的,编辑好这个配置文件之后,需要重启 gateway,然后刷新 model-list:

1
2
3
openclaw gateway restart
# 查看一下有哪些模型
openclaw models list

5. 正式启动 openclaw!

1
openclaw dashboard

运行完这个命令会给出一个带有 token 的连接,直接点击这个链接即可,然后你就可以看到这个界面:
image.png
随便询问一个问题,只要能正常输出,就说明你部署成功了。

对接飞书

网上教程很多,但还是推荐以官方文档为准:https://www.feishu.cn/content/article/7613711414611463386

其实就只需要在 wsl 中执行一条命令即可:

1
npx -y @larksuite/openclaw-lark install

这里遇到一个奇怪的 bug,就是 wsl 的文件目录,你最好在cd ~之后启动安装命令,因为我发现在默认的 root 文件夹安装老是会走代理,引发错误:
image.png
换到当前用户文件夹之后就好了。启动的中途显示飞书的二维码,用飞书手机端扫描一下就会显示同步通知,根据指示操作即可。基本上 webui 里可以看见的话,这里都是可以正常访问的。

报错处理

1. 创建定时任务时报错 gateway closed (1008): pairing required

很烦,刚想让它给我创建一个定时任务就报错,查了一下,错误 gateway closed (1008): pairing required 是 OpenClaw Gateway 的一项预期安全机制。当一个新的客户端尝试连接 Gateway,且该设备尚未被授权时,Gateway 会拒绝连接并要求“配对”(Pairing)。
解决方法就是检查当前所有设备,给未被授权的设备授权:

1
openclaw devices list

image.png

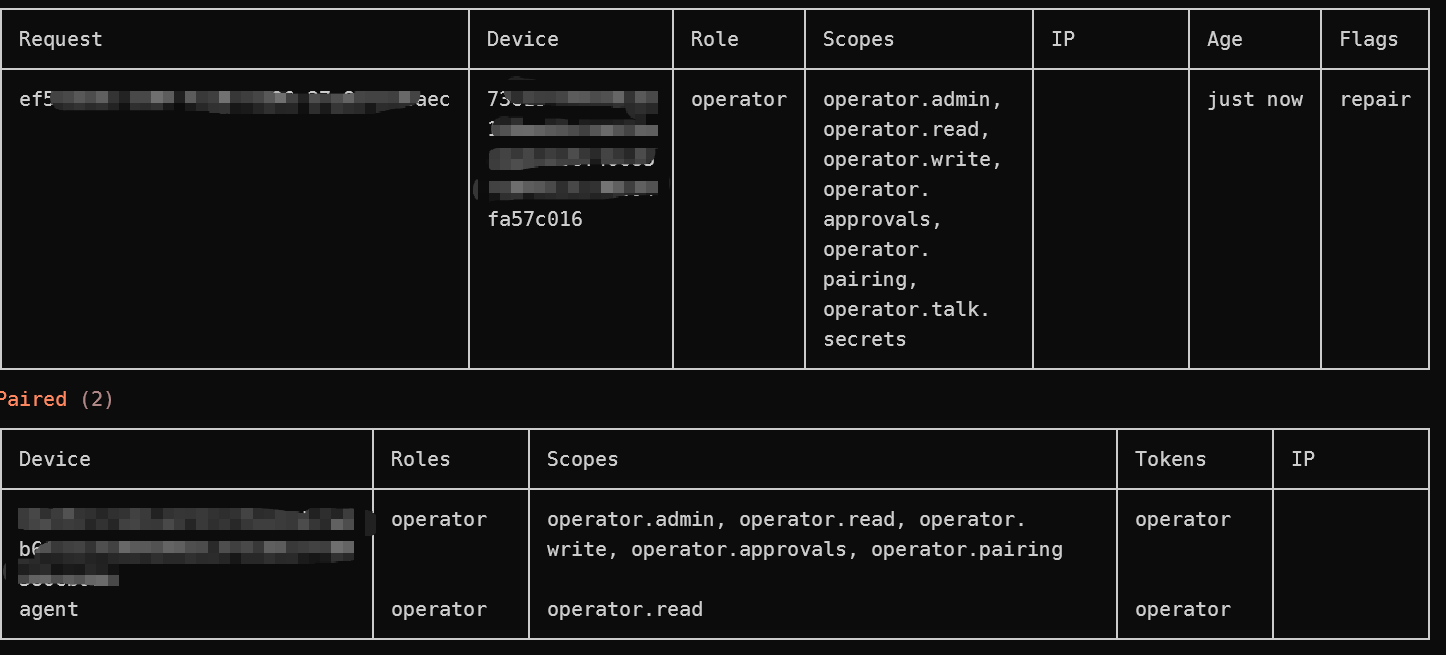
如图,上面这个打码的设备就是 Pending 状态的,所以我得给他授权(传 request_id 即可):

1
openclaw devices approve exxxxxx5-2xx4-4xxx-11x4-asdaxxxxxxxxaec

这个就是配置好的状态,这个设备现在就拥有全部权限了。
image.png

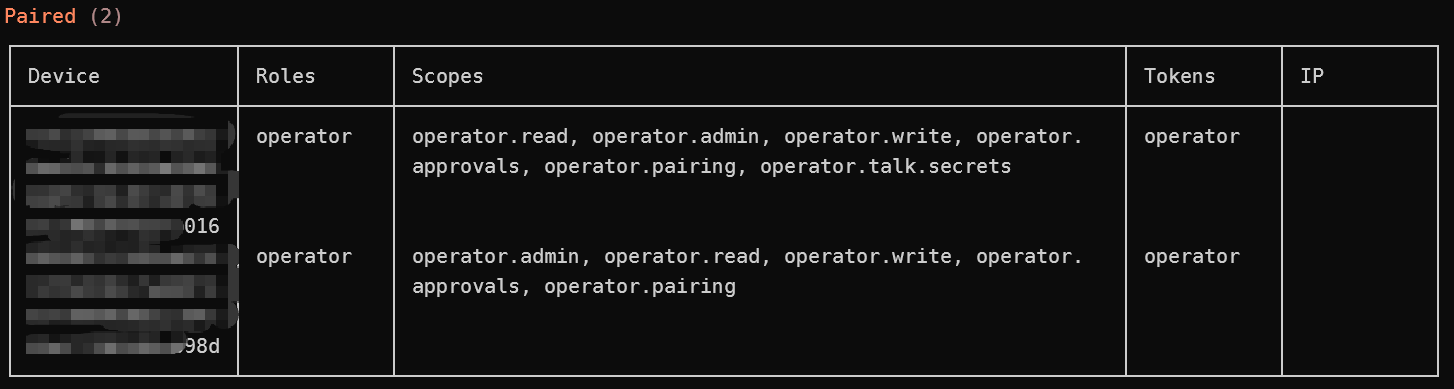
现在就可以正常配置定时任务了,但是好像很吃 token。(发起消息的时间是 21:14)
cb3f93fa9ba853aa488fcadfe1d57acc.jpg
455f177aea9c0d3993a769c05ba6a01f.jpg

  • 标题: OpenClaw使用体验
  • 作者: fanz
  • 创建于 : 2026-03-12 13:53:47
  • 更新于 : 2026-04-12 21:21:24
  • 链接: https://redefine.ohevan.com/tdd9po/
  • 版权声明: 本文章采用 CC BY-NC-SA 4.0 进行许可。
目录
OpenClaw使用体验